 |
| A bit lackluster |
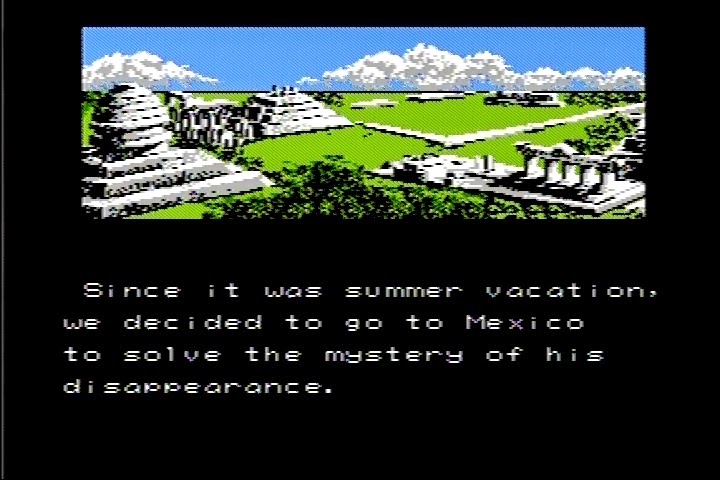
I thought the game would be longer, and I had a theme going for the titles. Apologies for forcing it; I'll try to plan it out better next time. The second and third generations blazed by in less time than the first. I really didn't anticipate it wrapping up when it did.
 |
| The monsters sure got stranger |
Divisia had some new equipment, and I ended up having enough to fully deck out Nial, Mieu, and Wren. To the west was the rebel army. Who were they rebelling against? Apparently Lune. I'm not sure why they were called rebels honestly since Lune wasn't their king or ruler but an invading force. When I arrived, the leader (Ryan) thought I was working for Lune since he'd heard that I'd "released" Alair.
 |
| This one line convinced him I was on the rebels' side |
Ryan joined after Lune appeared out of nowhere to gloat, and Ryan imparted the sub part for Wren. With it I returned to Aridia through the southeast cave in Landen. That cave was accessible thanks to the Twins' Ruby in Ryan's possession. In the single town in the land of Aridia, I learned of a whirlpool to the southeast. A whirlpool that didn't actually appear on the map. I had to use my imagination to find the hidden spot at the end of the river.
 |
| What passage would this be, and where's the whirlpool? |
The world below Aridia was lush and vibrant; however, the only interesting location was a temple. This time it housed not a booming voice, but a young girl watched over and cared for by either old people that have lived for 1,000 years or cyborgs. Housed in the temple was Laya, Laya's younger sister. Not confusing at all. The younger sister of the woman who battled Orakio was kept alive all these years through cryogenic sleep.
 |
| Here I learned the original Laya's fate... black sword, where have I heard that before? |
After reviving Laya, one of the caretakers told me with her stone (the Mystery Star) I could now travel southwest to Frigidia, and the town of Mystoke held the key to truth. Frigidia was a snowy wasteland with Mystoke as the only accessible town. The townsfolk were waiting for Laya, and instructed the party to venture into the monster infested castle to find Laya's Pendant, and her final message.
 |
| Orakio and Laya ran off together never to be seen again |
Laya revealed through her pendant that she and Orakio discovered they were being manipulated by an ancient evil, and were going to seal it. It seemed they succeeded, although it's unsure what become of them in the end. Still, as Dark Force does, he returned after 1,000 years.
 |
| Fan[ny] service |
In Mystoke, another random character told me to head for Aerone, south of Divisia. The cave back to that land was locked, but with Laya's Pendant I traveled quickly from one temple to the next. Temples exist next to every cave without exception, which is helpful for fast travel. Before I left, I adjusted the techs on Laya, which included healing. Finally having two characters with with healing really relieved my need for healing items. The game just kept getting easier and easier.
 |
| Every four spells are balanced against each other, and adjusting them makes one more powerful while another becomes weaker |
When I arrived in Aerone, home of the pilots, I was told the two satellites were named Dahlia and Azura, and they orbit the homeworld, Alisa III. I was then instructed to find the rocket shuttle to the east of a path to reach Dahlia, home of Lune.
 |
| What path? Follow it where? |
I was a little lost for what to do there. I explored the land outside thinking I'd find some path outside. I wandered around, but only confirmed these worlds really were bare except for the important locations. When I returned to Aerone and spoke to everyone again, it occurred to me that the message might be quite literal. I followed that short cobblestone path to the right, and before I hit the woods I found myself in the rocket lab.
 |
| Well that explains the bubble worlds, but how could someone forget they're on a spaceship? |
The satellite Dahlia was actually a space station orbiting a cluster ship, the Alisa III. While there were monsters on the surface, they were strangely absent from the inner dungeon where I found Lune. He was experiencing some form of mania after being locked away for so long. He was slightly harder than the king of Cille, which really isn't saying much.
 |
| Confirmed Power Blade was set in the Phantasy Star universe |
Once defeated, he recognized Laya's Pendant and called off his attack. He recalled his entire army. With that Nial's quest ended abruptly. I suppose with the threat of Lune removed, there wasn't anything more to accomplish. Except, you know, selecting a woman to marry.
 |
| Called it! |
I chose Laya since I'd actually traveled with her. With that union, the Orakians and Layans finally united into a single bloodline. Born from that couple were twins, Adan, a boy and main character for the third generation, and Gwyn, a girl. Both were capable of healing, and I once again was accompanied by Wren and Mieu. At the tender age of sixteen Gwyn starting having nightmares about falling into a black hole.
 |
| Or was it 15... |
What really started off the adventure was a huge earthquake. Nial commanded Adan to investigate, and Gwyn tagged along. He suggested Lune as a good place to begin. Speaking with random people, the prominent rumor mill talk was of Rulakir, the last competent pilot still around. On Dahlia I was told to seek out Skyhaven in Frigidia, but I'd first need the aero part for Wren, which was coincidentally in the dungeon. I learned that the earthquake happened when we were hit by debris of another ship just like ours being destroyed by a different ship just like ours. Supposedly ours and the aggressor were the last two ships. That mysterious attack remained unanswered.
 |
| Kara is Lune's daughter, and she joined the party |
With Kara joining, we had a full party very early on, and another healer. That's four out of five characters now capable of healing the party. With that, I now felt completely overpowered. I delved into the dungeon and retrieved the aero part while everyone gained obscene amounts of experience.
 |
| Transform! |
 |
| Flying around without random battles is the best feeling, but take-off and landing are only possible at the airstrips |
With access to flight I found a couple new towns in Frigidia. Gwyn also came with Laya's Pendant, so I still had access to the teleport temples. I've heard other generations don't get such fast travel so early. I guess I got lucky and picked the quickest path through the game. Anyway, the first town was New Mota where ancient historians actually recorded the full history and origin of Alisa III and the full fleet.
 |
| The history in nice easy gif form |
Turned out everyone on these spaceships were survivors of Palm. Destroyed back in Phantasy Star II, Palm was the home planet of Alis. The people of the planet knew of an impending doom, and created 400 of these spaceships to escape. Only two remained, the Alisa III and New Palm. Now Dark Force is working to destroy the last two, and end the bloodline of his ancient enemy. The other town was Skyhaven, floating in the air just north of Mystoke.
 |
| Now I have to collect some weapons to defeat Dark Force |
The wise men of Skyhaven told me I would need a word of power to re-energize the legendary weapons of Orakio's Sword, Miun's Claw, Siren's Shot, Laya's Bow, and Lune's Slicer. I already had the bow (passed on to Gwyn from Laya), and the slicer (passed on to Kara from Lune). Before I left I gathered the aqua parts for Wren from the local dungeon, and I learned of a sage near Cille that could teach me the word of power. The sword, I remembered from the beginning, was stuck below the lake of Landen. Getting there required the aqua part and the sub part.
 |
| Seemed strange to pull the sword out to defeat Dark Force when he's supposed to be sealed by the sword |
After pulling the sword, Adan learned Megido, which is a very powerful spell that I had no control over. There's no way to use the technique, and it sits in a slot off by itself. With sword in hand I fooled the wandering cyborg in Aridia into thinking I was Orakio. She powered down, and I swiped her claw. Four out of five weapons, I thought I might as well see that sage to check for hints. Turned out Siren was waiting for me inside, but collapsed after finishing a lamenting monologue about our true enemy.
 |
| We are the knights who say Nei! |
In addition to the power word for the weapons, Mieu learned a technique called Grantz. I was then told to returned to Skyhaven with the word to power the weapons. I did so, and they were renamed Nei <weapon type>. That left only Dark Force to take care of, if only I could find him.
 |
| All seven areas were available during the last scenario |
The only areas left unexplored were the bottom right and far right. I checked the bottom right first, and quickly found a floating city as described by someone in Skyhaven. By the conversation I had with the first NPC I arrived, it seemed I was in the correct place.
 |
| Yep, this looks like the right place |
Unfortunately, I couldn't get in. As soon as I had entered, that lady in yellow walked forward and blocked my path. I tried to get by her, talked to her a couple times, but she just wouldn't budge. I guessed that I might have missed something. There was a whole other circle I had left unchecked. So, I left and looked for something there. I found three villages, but all the hints there seemed inconsequential to defeating Dark Force. After wasting an hour exploring, I came back to Lashute only to find the character that blocked me before walked in a different direction. A completely random chance to move caused me to waste an hour.
 |
| Aren't you the pilot I was supposed to locate? |
Rulakir waited for me at the end of the floating city. While the fight was long, it wasn't difficult with the amount of healing I had available. Rulakir was working for Dark Force by steering the ship into the black hole, possibly even might be Orakio's twin brother, but it's not very clear through only this storyline. Apparently each path adds a bit more to the story, and each third generation has a different ending (even though all the basic actions are the same).
 |
| This was right before I faced Dark Force... I might be overleveled, but I never grinded |
Beyond Rulakir was a dungeon maze with a few chests. In one of the chests was Dark Force. I'm not really sure why he was hiding in a chest, but it sure did surprise me. Luckily I had more than enough power to get through the fight.
 |
| Is that a second face in your crotch? |
Like all the other bosses, Dark Force posed little threat. His attacks were a bit more annoying, but I dedicated a couple people to Gires (party heal) duty, which kept the damage in check. With the amount of meseta I had saved up I could have just as easily bought some star mists (full party heal) for each character. Dark Force was a bit different, and consisted of three parts: his hands and head. The right would attack, his left would heal, and his head would either attack or use a tech that would damage everyone. Instead of doing the smart thing and focusing on the healer though, I buffed everyone up and attacked the right first, then the left. I got lucky the healer didn't revive the other hand, but once I got both hands down his head was easy. With that Dark Force was finally defeated!
 |
| Ho-hum... see you in 1,000 years |
With that the game ended. Adan caused the collapse of the evil floating city by automatically using Megido, and Mieu saved the group by automatically using Grantz. The black hole that Alisa III was headed for was averted. Everything was right with the world. In the end, the game felt a bit weak. Dark Force was pathetic, and the story just kind of wrapped itself up. It also suggested a departure from the second game while still being tied into it with the Nei weapons, and the possibility that Earth was colonized.
 |
| Is this suggesting the people of Alisa III found Earth? A planet supposedly made uninhabitable by the humans in the second game |
Elapsed Time: 7
h47
m (
Final Time: 16
h01
m)
Overall, I'm glad I got to play through it, but I don't think I'll do it again. I don't have an inclination to play through the other endings. Give it a couple of years though, and I might feel different. Phantasy Star III is an unpolished product with some promise that never truly delivers. Time for the ratings.
Combatant - The combat in this game is very weak. Most fights are over by the end of the first round of auto-combat, and boss fights are the same except for a character or two relegated to healing. I really couldn't tell if buffs had a significant affect on the outcome. Damaging spells are inefficient. I forgot that some items granted abilities in battle, but honestly, I never needed them and it would have only made the difficult more tilted. The monster sprites were varied, but their AI was not (or maybe I didn't see enough of it because they died so quickly). Much like the rest of the game it's passable, but nothing stood out as great.
Rating:
5
 |
| You wouldn't like Adan when he's angry |
Admirer - It's interesting that the techniques of each character were customizable, although I didn't have any control over what class of techs they had. Also, techs were set; there was no way to gain more techs, and proficiency accumulated slowly. Appearances were set, although with each new generation characters changed. It's difficult to put into words effectively, but characters lacked a connection due to the constant change and the limited dialogue.
Rating:
3
 |
| There are some nice shots of the characters |
Puzzler - Main quest, I don't think there's a game that won't have one, and there are plenty of hints to keep the party on track. At times this meant speaking to everyone in every town. Miss a character, and it could be a key hint for making progress. No side quests, who needs them. No puzzles or riddles either. Just do what the game says and it'll resolve itself. I'll give it an additional point for the branching paths.
Rating:
3
 |
| Most of the game happens instantly |
Instigator - As for story, it has some interesting points, but muddies the timeline a bit with references to the second game's special weapons and Earth that don't make sense. Maybe I'm reading more into it and the parallels are coincidental. While there's some lore around the legendary items, the exploits of Lune, Siren, and Miun aren't ever discussed. Maybe I'd learn more about it through the other story lines.
Rating:
3
 |
| Just like the hopes of this being another hit game |
Collector - Limited inventory with no way to store items. There aren't many items to begin with, and figuring out who can use what was difficult. I didn't even know that Lena could use the needler weapons. There were strange stones to collect, and they could be put into the belt slot, but I never found a benefit to do that. Really they're just keys to enable passage through set caves. Most items were bought, and it's simple to buy them all by the end.
Rating:
2
 |
| Not everyone has your telescopic vision Mieu |
Explorer - The music is really good. Definitely give it a listen if you're into video game music. The graphics were boring, except for the enemy sprites, which ranged from good to awesome to overly detailed messes. The world as a whole was uninteresting; there was nothing to discover outside the scope of the main quest, and it has a lot of sameness. With no sense of discovery, and sections walled off arbitrarily, there's no reason to stray from the path.
Rating:
2
 |
| Awesome, only three more years to wait for the sequel |
Final Rating:
18 [30%]
It scored a bit lower than Phantasy Star II, but I think that's fitting. There's less here from each area, and I was bit harsh on the second one due to personal taste. While I liked this one more, I think it has to do with the game not overstaying its welcome (i.e. not wasting my time), and getting through it was rather trivial. I'm okay with a hard game if it's good, but when it's bad my patience grows thin. I had fun, but now it's time to move on to Tombs & Treasure. I've actually finished that one as well, and have been taking this holiday week off from playing while I catch up on blogging. I will start Starflight on Monday at this rate, and have the post for Tombs & Treasure out before then. I hope everyone is enjoying their end of the year celebrations.


